How a Plate Is Made
The photogravure process
Edward Curtis used the photogravure process to reproduce his photography for The North American Indian. The process was developed by Karel Klíč in the 1870s and was, in Curtis's era, the most economical way to produce multiple high-quality prints from a single photographic source. It is also painstaking — every step requires hand work, chemistry, and judgment.
The eleven-step process
A finished photogravure plate was the result of approximately nine distinct operations:
- Positive transparency. A positive transparency was made from the original glass plate negative — reversing the tonal information so the etching process could work from a positive image.
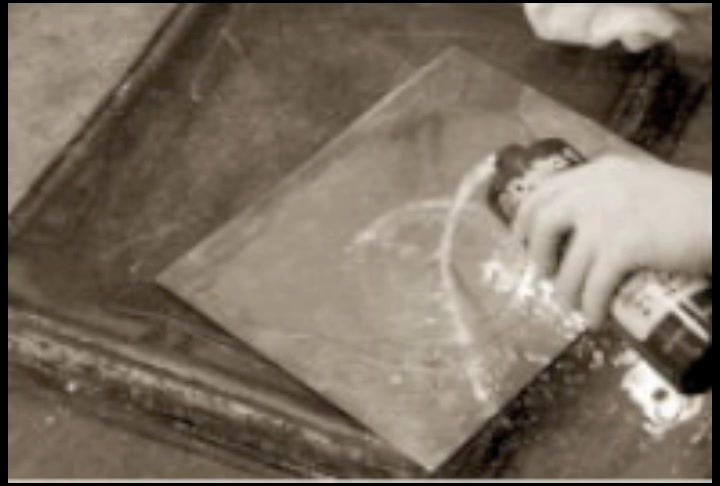
- Plate preparation. A copper plate was polished, cleaned with acid and potash, and its edges beveled so they would not damage the paper during printing.
- Aquatint ground. Aquatint grain — fine particles of bitumen — was deposited on the copper plate and adhered by heat. The aquatint preserved approximately half the plate's surface, creating a web of microscopic high points around each future ink cell.
- Carbon tissue exposure. Carbon tissue, a gelatin-coated paper, was exposed to light under the positive transparency. Light hardened the gelatin in proportion to the brightness of the transparency.
- Tissue transfer. The exposed carbon tissue was treated in cold water, then squeegeed face-down onto the grained copper plate.
- Substrate removal. Warm water dissolved the tissue's paper substrate, leaving the gelatin layer in contact with the copper.
- Tissue development. Hot water dissolved the less-exposed, more-soluble gelatin, leaving the more-exposed, less-soluble gelatin on the copper as an etching resist.
- Etching. The plate was etched in successive baths of ferric chloride at different concentrations — measured in degrees on the Baumé scale, a feature unique to photogravure. The varying solution strengths created tiny "wells" of varying depth across the plate's surface, each well capable of holding a different amount of ink.
- Cleaning and edge preparation. The plate was washed clean of remaining carbon tissue and dried. The edges and back of the copper were stopped out — sealed against accidental inking.
Why the plate is the final creative artifact
Each printed gravure is a partial expression of what the plate contains. Press pressure varies. Paper varies. Ink coverage varies. Two gravures from the same plate, taken in succession, will differ subtly from each other.
The plate itself does not vary. Etched once, it carries its image permanently — and Curtis returned to many plates again and again, between print runs, refining details over a twenty-year period. Burnishing here. Re-etching there. Scraping out a passage and re-engraving it. The plate accumulated his decisions in metal.
When the project ended, what survived was the artist's working surface: edited, refined, the final visible record of his judgment about each image. The gravures printed from these plates are interpretations of that record. The plate is the record.
Steel-facing — the protective intermediate state
Steel-facing was applied to protect the soft copper plate during print runs — the steel layer absorbed the wear from repeated impressions. Once a plate's printing was complete, the steel facing could be removed (in an acid bath, with extensive cleaning and polishing), revealing the copper plate beneath.
For decades after Curtis's death, the plates rediscovered in the Lauriat Company warehouse remained steel-faced. They had been stored in their working production state — protected for further printing that never came. The work of returning them to their copper state, the state Curtis worked in when editing, has been the project of their current owners since 1982.